Sunday, February 18, 2007

Jekyll and Hyde Fireplace Top

Saturday saw the work start on the fireplace cap.

This began by finding two slabs of redwood that had at one time been one. A template scribed and cut to match the FP top was used to find the pieces that would work.

The template was made by laying a piece of scrap of aspenite on the FP then scribing and cutting it to match the stone. The wall edge became the reference edge for the work.

The pattern was screwed on to the slabs, then using a router with a template plate I cut a groove to match the template one inch deep.
The next job turned out to be the work of the day, in that the area needed to routed out in side the groove. The largest router bit in my vast inventory of 6 router bits was only 3/4" in diameter. I made a lot of sawdust (router dust for the purest) over the next two hours.
The crack between the two slabs was glued up and the template was then screwed back into the inlay (routed) area. It was clamped up and left over night to dry.
The top surface was had been sanded with a belt sander and the dust from this process was saved in a box for later. This was the first time I have used a hand held belt sander and I can tell you that my shoulders are still sore.
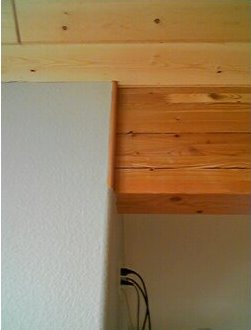
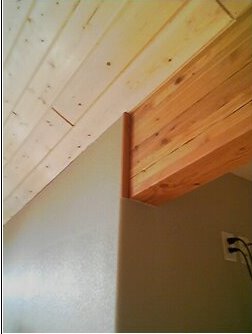
On Sunday the top was pre-fit to see how it would look.
We decided on a design change was needed.
The kitchen side would remain a "live edge". This became the Mr. Hyde side (wild). I still need to do some work with the wire brush before it is ready for finishing.
The great room side needed to look more "finished". We scribed an arc across this front. This is the Dr. Jekyll side.
To cut the arc became problematic as the glued up slab was so large and I wanted a clean cut. This meant the bandsaw would not work, due to the manuvering need to make the cut. The rotozip was too small (need a 3" cut depth) and the same was true of the router. I thought of using the saber saw, but of course that was in Parker. I was going to attempt it with the recip saw, but I was uncomfortable with what I saw (pun) the result being. As you can see my thinking was very "Norm" (New Yankee Workshop), in that if it wasn't a power tool it didn't even come to mind.
Then I remembered the portable power plane that had been gathering dust in the barn for a couple of years. It had a 3" width and gave a nice finished cut. This could be used to cut the arc to within 1/8", or so, of the scribe line, then finish to the line with the 3" wide belt sander. This would be the ticket.
The planing of the arc only took a few minutes. The edge were squared using the nifty jointer fence included with the planer, but never before used The was then sanded to size. The pile of shavings was impressive.
The top could have been finished, if I had only had some super glue. The slab still had a few imperfections, e.g. the crack in the front edge that needed repair. The plan was to use the sawdust collected during the surface sanding to fill any divot or crack, then drip on the super glue and sand it down. This trick was learned from a TV program called Woodworks, which you should look at if you get a chance. David Marks makes some of the nicest (and expensive) furniture I have seen.
Next weekend I should be able to complete the top. I plan on finishing the Redwood with a Linseed and Tung Oil mixture.


Wednesday, February 07, 2007

Glulam to Sheetrock Trim

We finally figured out a trim style that worked for the area where the glulams intersect the sheetrocked walls.

We have tried beveled pine strips and quarter round without really being happy with the results. Either the color of the trim wood was too light or the shape didn't not blend well. I think if I was doing this over again I would have had the sheetrockers continue the bullnose edge up over the glulam, but I didn't so here I am.

But it was a beautiful day on Saturday so I spent some time sitting around and taking in the view.

The snow is melting, and another week of this weather should see it gone.

Hard to believe that just a week ago folks were having a had time even making it down Autumn Creek Drive. I even got stuck a couple of times with the truck.

Don't know if it is visible in the picture, but the beer is approriately named "2 Below".

Back to the trim.

What has worked was to replicate the bullnose profile with wood. In order to do this I needed to find pieces that were the same species and color as the glulams. Luckily I grabbed every scrap end of glulam material, during the frame-up, and stored it in the barn during construction, so I had a source.

After sawing to rough size then squaring them up on the jointer, I router an edge with a 1/2" roundover bit. This profile was close but not quite copacetic with the sheetrock bullnose edge, which is probably a 3/4" profile, but the nearest store was a couple of hours roundtrip away. So I did it by hand.

I used a small plane to trim it to match. BTW: I used a small apron plane made by a German company named Rali. The nice thing about this plane is that it has replaceable blades. SO, no sharpening and honing, another thing I am not good at.

Once I had them formed to match and mounted the pieces were finished to match the glulams. I think they look great, but you be the judge.

As you can probably tell some of the items done to finish the house and get the CO, now on second look we are modifying.

Monday, February 05, 2007

Working the Fireplace

To complete the trim on the fireplace I need to add a cap and a stoop/seat cover around it. The cap is needed because this is a pennisula fireplace and there will be a TV located on top of it.

The stoop/seat will allow people to sit in front of the fireplace, on the great room side.

These items will need to cover the top of the stone veneer that has been applied.

With the types and colors of wood in the house we have decided on a darker wood for these pieces. I explored going with the native/natural beetle kill Ponderosa Pine, but the blotchy nature of stains applied to softwoods made me hesitant. We also looked at a stained Maple, but we have three Maple varieties already in the house.

So we started to look around.

Then another idea presented itself and that was to have a "live edge" on the seat portion versus a sawn finished edge. Live edge means that the natural edge of the slab is used. In this case minus any bark.

So the search was on, to find a live edge slab of a "darker" wood variety that would be large enough to encircle the fireplace. I check out a couple of places in southern Colorado; Collector's Wood specialties, near Gardner and The Wood Works in Canon City. CWS had what we were looking for but the price was way out of our ballpark and WW didn't have the type of slab we needed, but I will think about them for a future road gate arch project.

So I turned to a couple of sources used many times in building this house; Craigslist and EBay. After a few weeks of mining their sales and auctions I found some intriguing wood being offer out of Crescent City California. The slabs were gleaned old growth curly redwood. It seems that Dan at Curly Woods would remove wood and stumps left after the areas redwood groves were cut in the late 1800's-early 1900's. This was before today's forestry techniques and practices had come in to play, where virtually every part of the tree would be used and the area cleaned up before re-seeding.

After talking with Dan a number of times I ended up buying a large slab of curly redwood and the a 5' slabbed log, all 3" thick. Dan loaded it on a pallet and shipped it to me.

Once it was transferred to the pickup I was surprised that it still had an aroma.

Because of its age it has darkened to a nice color, but should lighten up a little after it is smoothed and sanded.

Now the work begins.

I will need to edge glue two slabs in order to form the cap mantle. These slabs will be edge finished on the outside with a few degree undercut.

Once it is the proper size and smoothed it will be set on the fireplace and the stone veneer outline will be scribed on the bottom. I then plan on routing out the scribed area to a 3/4" depth, that way it will sit around the top of the stone veneer.

The seat slab will be where I think most of the work will take place. The slabs measurements are in line with what I need, but the nature of a live edge presents the challenge to see if there is a better way to display it and if that way will cover the needed area.

After looking at it in the "flesh" versus a picture the best layout may bring it up a couple of inches to narrow. If that's the case I plan to cut the fireplace slot narrow and then scarf joint it on the exposed edge to gain the needed width. At least that is my plan now. This weekend I will template the seat area and then overlay it on the slab to see what works.

Once I get it to the right size, it too will be set, scribed and routed to sit down and around the stone veneer.

The plan right now is to finish the pieces with a Tung and Linseed oil mixture, that I tend to use on everything. I will keep you all posted as to my progress.

I will also use pieces of the redwood to trim the vertical fireplace to wall area.